Hints to Learn Photoshop Faster
Posted On : Aug 08, 2020
In my this article, i'm going to give some important informations and hints to beginners of the world's most famous and advanced image editing software Photoshop to learn and progress on it faster.
First of all, i would like to introduce Photoshop to you a little bit. Photoshop is one of the design and editing softwares that produced by Adobe company. Adobe is a company which made a revolution in digital media design and editing world. With the softwares they produced, they brought great innovations to many business areas especially in the advertising, cinema and the game industry, and made them progress seriously. Almost all of the stunning effects we see in the movies and advertisements have been created by these softwares. You can get detailed informations about the Adobe company and their products from their website or from other sources on internet.
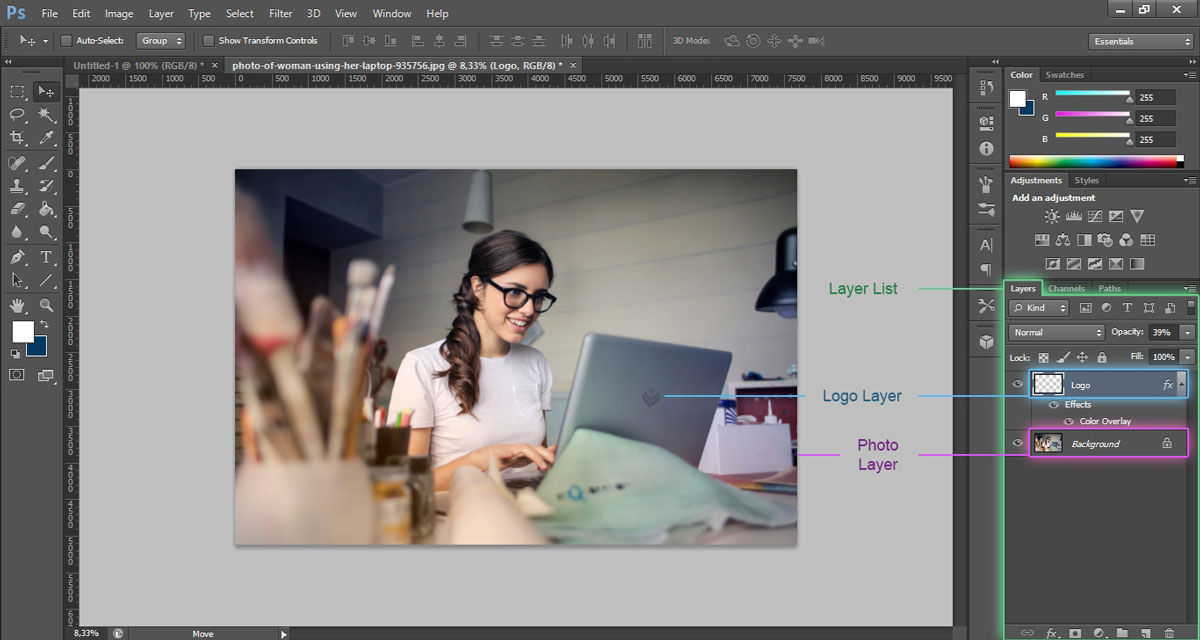
All right, let's take a look the hints and basic informations i talked about. The first thing you should know at the Photoshop is the all images and image elements are "layers" here. Photoshop considers these as layers to make them editable easily. Positions of the layers determine the being top or under of each others in the image. For example at following image, if the logo layer were at the down of the photo layer in layer list, it would be disappeared in the image because of it will be under (or back) of the photo layer.
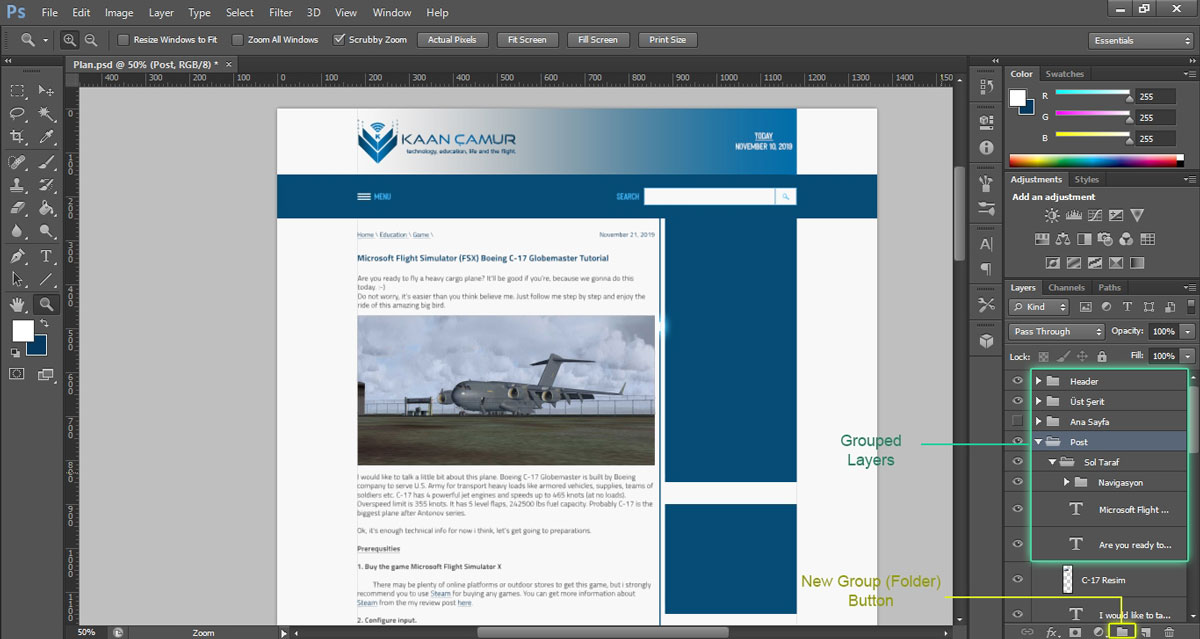
Collecting the layers in folders (grouping) provides aligning, styling and moving the layers at once in Photoshop. Grouping also creates a clean view in the layer panel and makes easy to manage projects especially have crowded content.
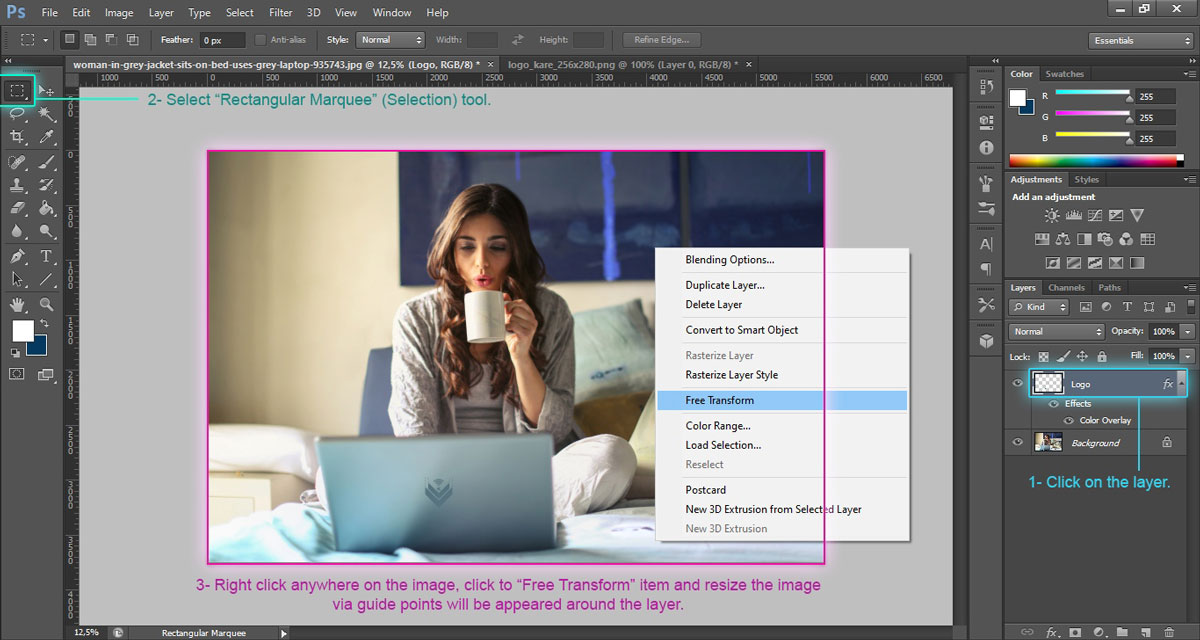
To resize a layer; click on the layer in the layer list once to select it, then select "Selection" tool from toolbox, right click anywhere on the image, click the "Free Transform" option at opened menu and resize layer via guide points will be appeared around the layer.
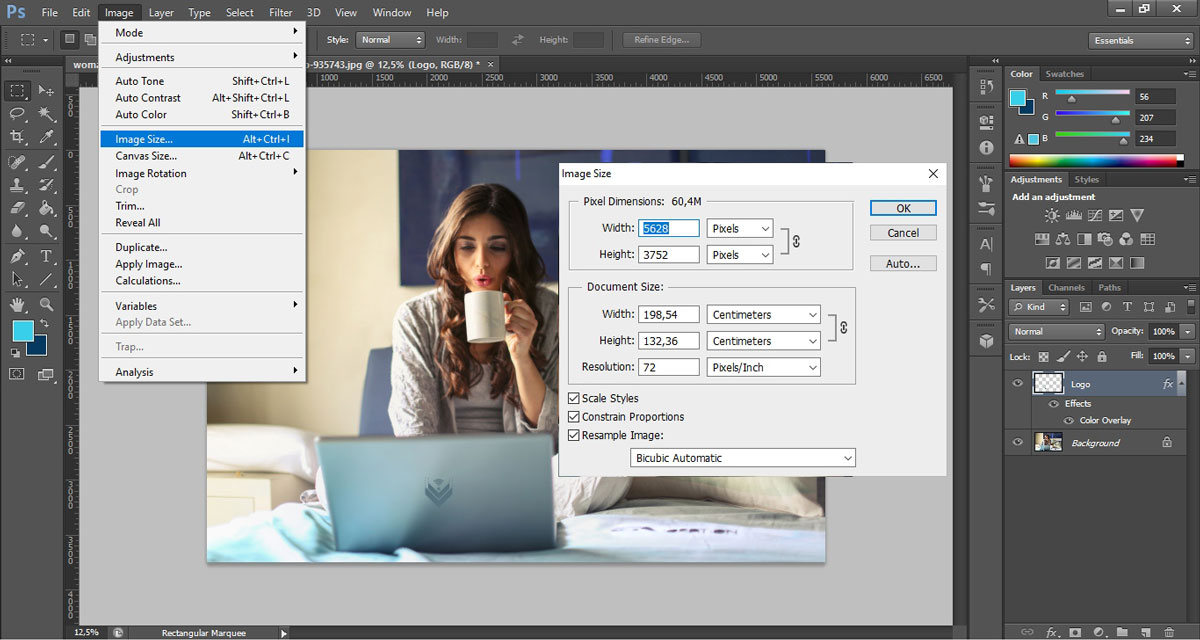
To change the complete image (document) size; select "Image Size" at the "Image" menu and enter new values for Width and Height. The chain symbol at the right side and the checkbox "Constrain Proportions" below (they're same functions) makes preserve or not the aspect ratio of image.
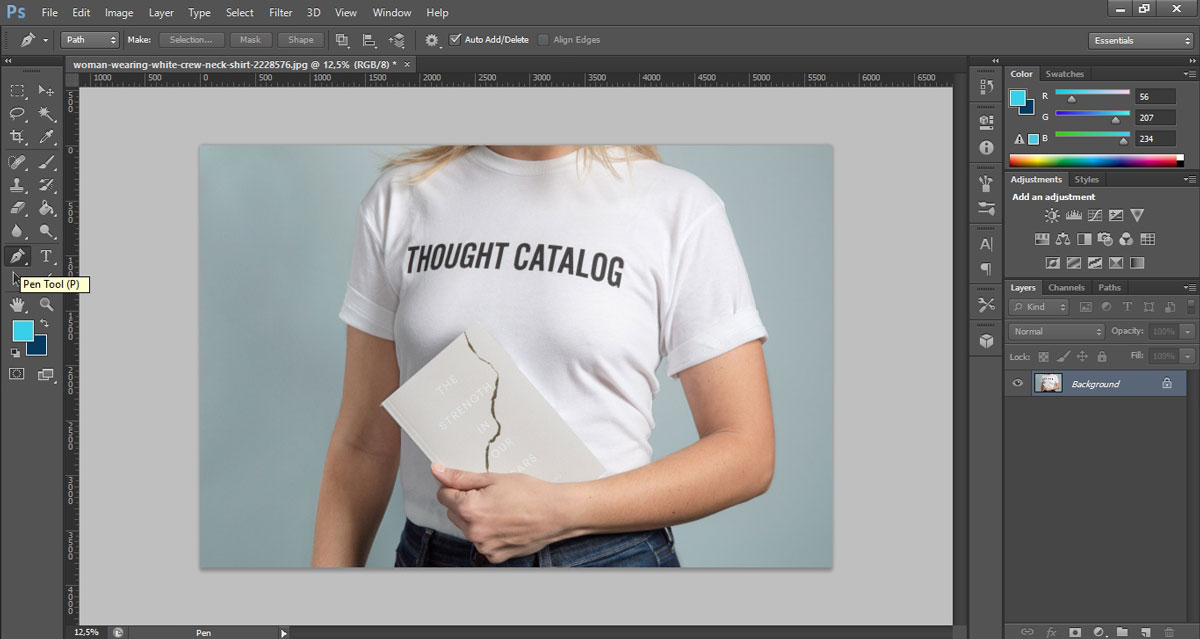
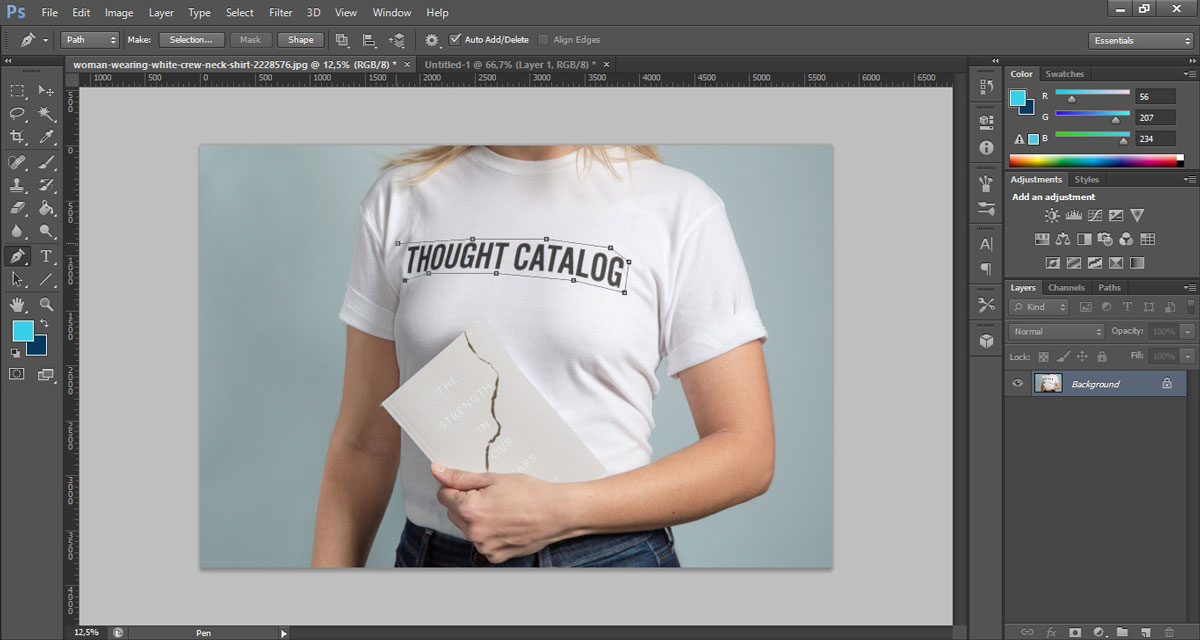
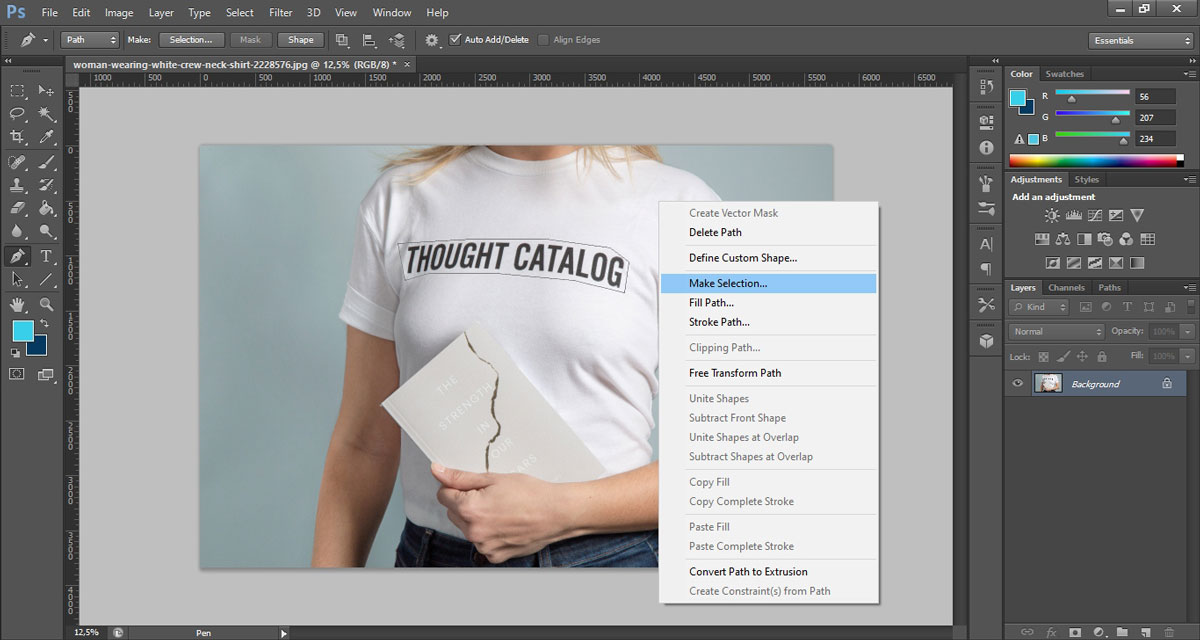
When need to make an indented selection, Pen tool can be used. It can be selected from the toolbox or by pressing P shortcut key on the keyboard. After Pen tool selected, create a selection path with the points appeared by clicking one by one around the image. The path will be completed automatically after connected the last point into the first point. When path is completed, right click on anywhere on the image and click "Make Selection" to select the area.
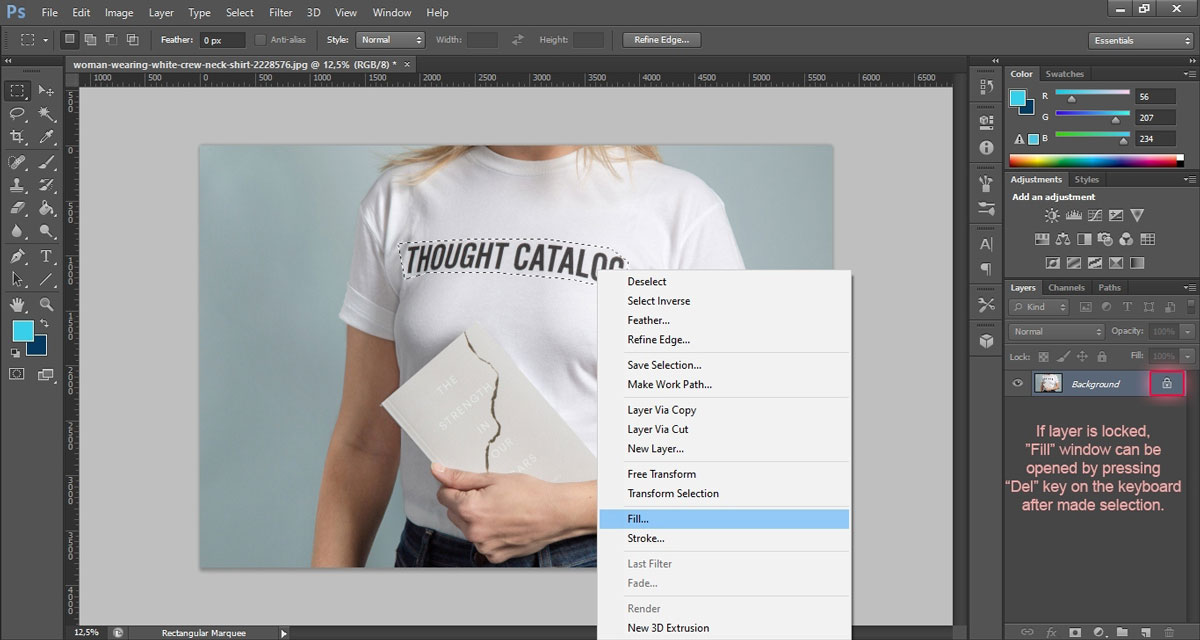
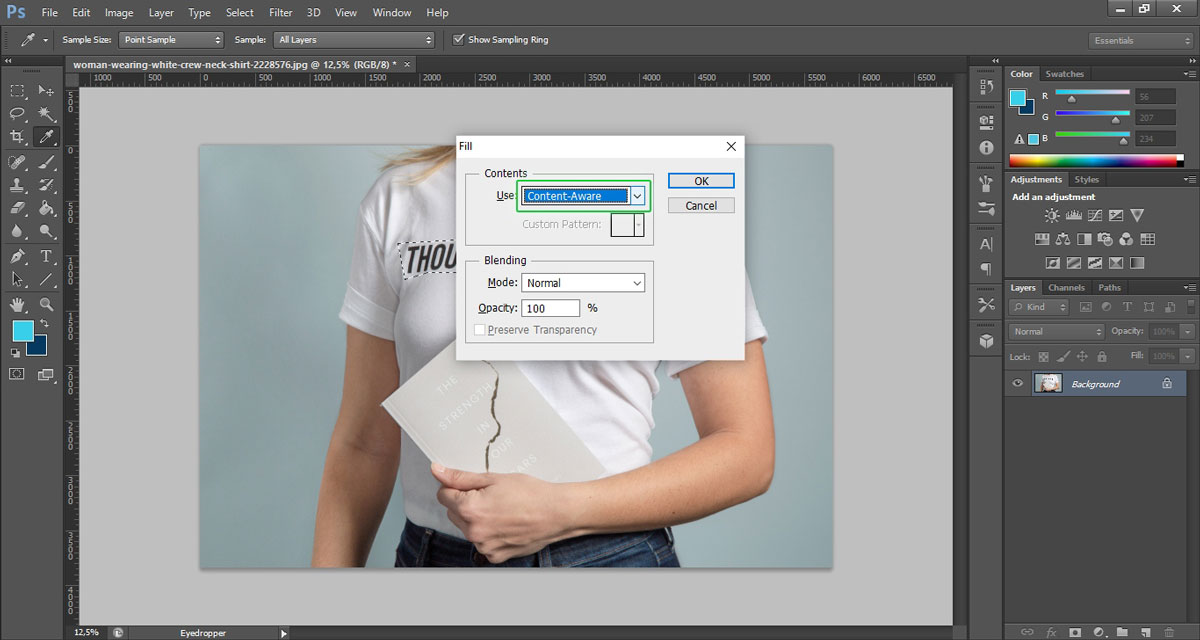
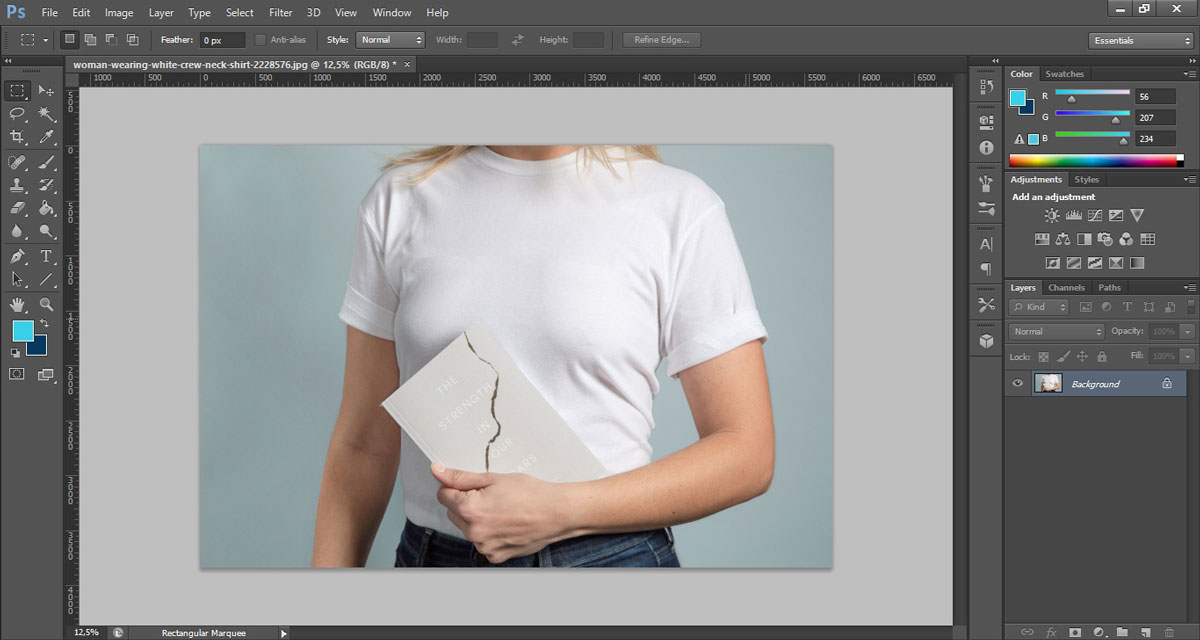
With the advanced algorithm of Photoshop, certain areas can be deleted from the image almost perfectly. To do this, right click anywhere on the image after made selection for delete area and click "Fill" item. In the opened window, select "Content Aware" from the "Use" menu and complete the deleting process by pressing OK button. This is actually not a delete process but a process of filling/painting the selected area according to image content. If result is not perfect and some traces left, just undo the process by Ctrl+Z or select "Undo" from "Edit" menu and retry with re-selecting the specified area as bigger or smaller.
That's all for now. I'll keep going to share more hints and informations like these in my next articles. Stay tuned.
